
TM 10-4510-209-13&P
0068 00
10. Ensure the assembly components are tight.
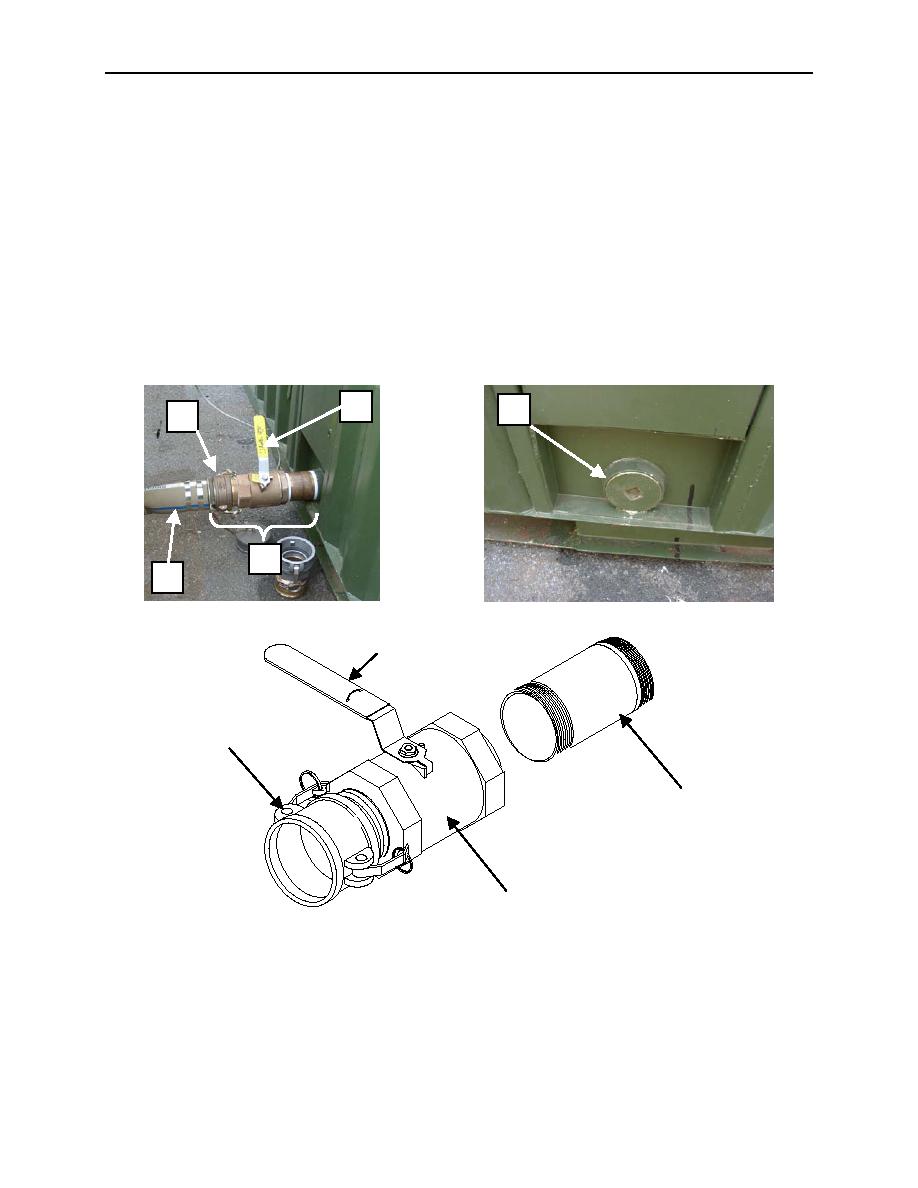
11. Remove the plug (4) from the countersink.
12. Install the discharge valve assembly (3) into the countersink. Ensure the valve is tight, and the
handle (7) is positioned to be easily operated.
13. Install the discharge hose (2), if fitted, to the QD fitting (1).
14. Place the CL back in service.
15. Clean tools and/or personal protective clothing and individual's equipment using a general purpose
detergent solution, then sanitize using a ten-to-one solution of household bleach in warm water (i.e.
6-ounces in 2-quarts of water) and allow to air dry.
7
4
1
3
2
7
1
5
6
END OF WORK PACKAGE
0068 00-2

