
TM 10-3510-208-12
TS 10-3310-208-12/4-79 (Sheet 2 of 2)
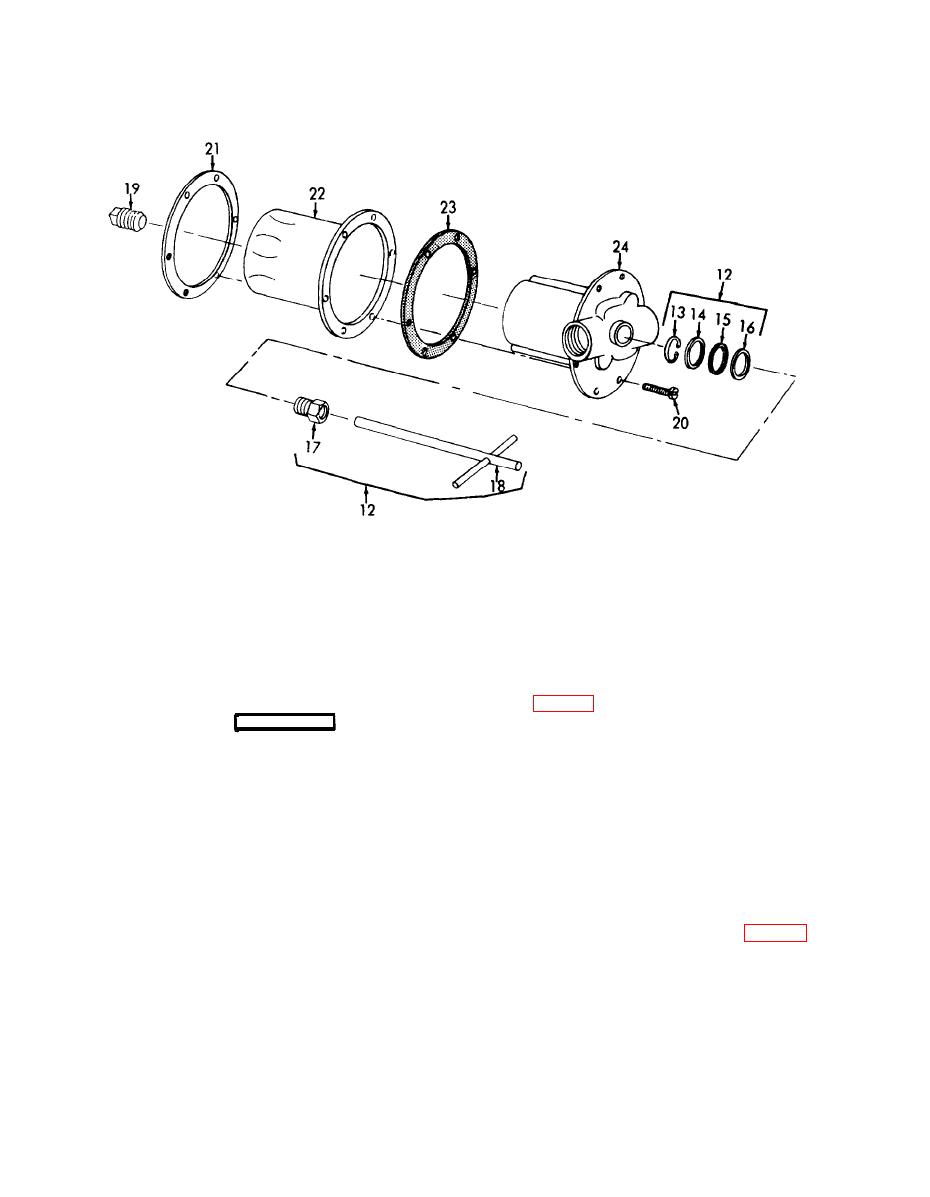
16. Washer
12. Handle ay
20. Screw
21. Ring
17. Nut
13. Ring
22. Housing
18. Handle
14. Washer
23. Gasket
19. Plug
15. Packing
24. Cap
Figure 4-79. Fuel filter, disassembly (sheet 2 of 2).
(23, fig. 4-79) in place and secure housing (22) and
c. Cleaning.
ring (21) to filter cap (24) with screws (20). Install
WARNING
drain plug (19) into housing.
Clean all parts in a well-ventilated area.
(2) Install handle nut (17), washer (16),
Avoid inhalation of solvent fumes and
packing (15), washer (14) and retaining ring (13)
prolonged exposure of skin to cleaning
on handle (18), then install handle assembly (12).
solvent. Wash exposed skin thoroughly.
(3) Install bushings (11 and 10) and adapter
Dry cleaning solvent (Fed. Spec. P-D-680)
(9).
used to clean parts is potentially dangerous
(4) Secure filter bracket (8) to filter assembly
to personnel and property. Do not use near
with bolts (7) and nuts (6).
open flame or excessive heat. Flash point
(5) Secure filter bracket (5) to assembled unit
of solvent is 100 to 138F. (38 to 59C. ).
using bolts (4), washers (3 and 2) and nuts (1).
Clean parts with cleaning solvent, Fed. Spec.
f. Installation.
P-D-680, and dry thoroughly.
d. Insepction and Repair.
water heater skid and secure with flatwashers (5),
(1) Inspect all parts for wear and damage.
(2) Repair and/or replace damaged parts.
bolts (4), lockwashers (3) and nuts (2).
(2) Install the nipple (l).
e. Assembly.
(1) Position filter housing mounting gasket
4-111
