TM 10--3510--221--24
0267 00--2
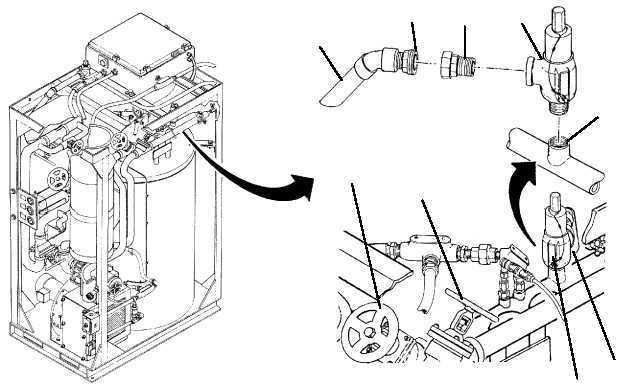
HEATER RELIEF VALVE REPLACEMENT --
Continued
0267 00
1
2
8
9
3
6
7
4
5
ROTATED 90
INSTALLATION
CAUTION
Relief valve comes preset. Never attempt to adjust cracking pressure. Changing, or
improper adjustment of relief valve could allow thermal fluid pressure in heater piping to
exceed safe operating pressure, resulting damage to heating system components.
1. Verify correct setting of new relief valve (6). Obtain a new relief valve if settings are not as stated below:
a. Ensure data plate (8) shows a cracking pressure of 100 psig.
b. Ensure safety seal (9) is intact.
2. Apply pipe thread sealant to threads of relief valve (6) and nipple (7).
3. Thread nipple (7) into relief relief valve (6).
4. Thread relief valve (6) into heater manifold (3).
5. Attach vent piping (5) to relief valve (6) and tighten union (4).
6. Open isolation valve (1 and 2).
7. Wipe any residual thermal fluid with a clean rag.
8. Use maintenance menu to test heating system (WP 0010 00). While heating system is operating visually
check for thermal fluid leaks.
END OF WORK PACKAGE