
TM 10-7360-226-13&P
0006 00
CONTAINERIZED KITCHEN (WITH TRAILER)
OPERATION UNDER USUAL CONDITIONS
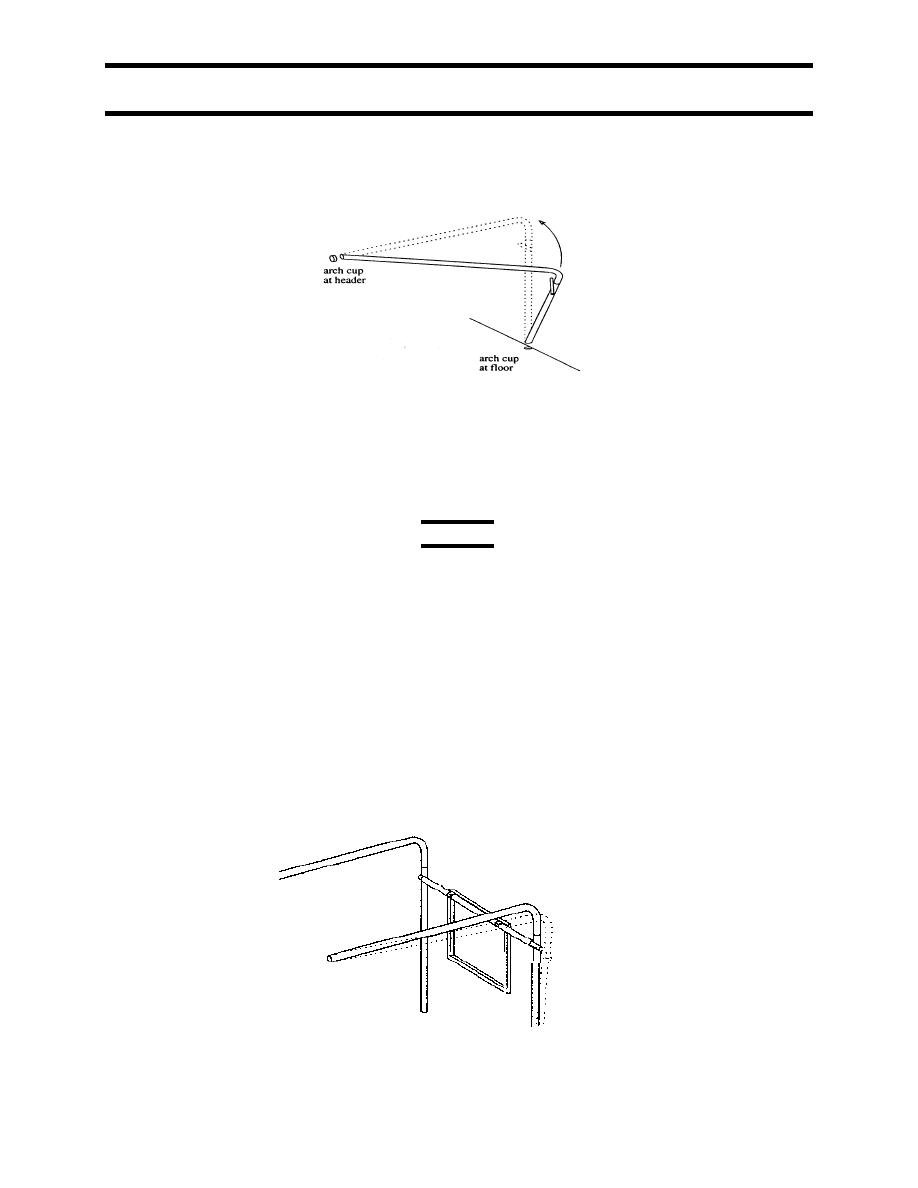
Figure 7. Arch Frame Inserted into Arch Cups.
7. Pushing lightly on the end of the assembly to hold it in the header cup, swing the assembly
(keeping corner below fabric cover) until the vertical bottom end is inserted into arch cup in the
floor.
WARNING
Until the arch spacers are installed, the roof arches may fall.
8. Rotate the assembly into vertical position. Some force is required once the arch contacts the
fabric. Other personnel may release the fabric to help. Once in place, release the arch.
9. Repeat steps 6 through 8 for the other two central cup locations with roof arch/"X" vertical
assemblies.
10. Repeat steps 6 through 8 for the two corner locations using a roof arch and a "T" vertical.
NOTE
The stubs on the verticals must face toward the inside.
11. Install arch spacers, as shown in Figure 8, between the center arch and its two adjacent
arches. Slide an arch away then back to push the stub inside the spacer.
Figure 8. Arch Spacer Installation.
0006 00-9
Change 2
