TM 10-8400-203-23
26-20 Change 10
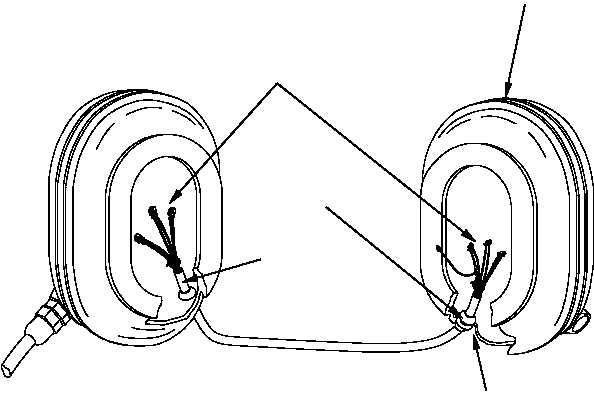
Rubber
grommet
When repairing the neck cable assembly remove all internal components from both earcups taking care to
notice the order of placement. Cut the tie wrap off of both ends of the neck cable from within the earcups. Cut
off all mini connectors from both ends of the neck cable from within the earcups, and remove the neck cable.
Figure 26-17. Headset Assembly
Start inserting the new neck cable with the side showing the extra white conductor and Black and Orange
conductors mounted on the same mini connector, into the left ear cup. The left ear cup is the side without the
boom/microphone. Fish the mini connectors into the earcup. Then lubricate the rubber grommet with a soapy
water solution and push and twist them into the ear cup holes. A small flathead screwdriver may be necessary
to move the grommets. After inserting the grommets into the ear cups, lubricate the inside of the grommets with
soapy water solution and pull the cable into the grommet so that the neck cable is into the ear cup ¼ inch past
the heat shrink tubing on the cable. Tightly pull a nylon tie wrap around the cable assembly on this ¼ inch
portion of the neck cable to prevent the cable from being pulled out of the ear cups. Plug in all the mini
connectors.
26-8 REPAIR - Continued
Earcup
Mini-connectors
Earcup hole
Heat shrink
tubing