
TM 10-3510-208-12
TS 3510-208-12/4-71
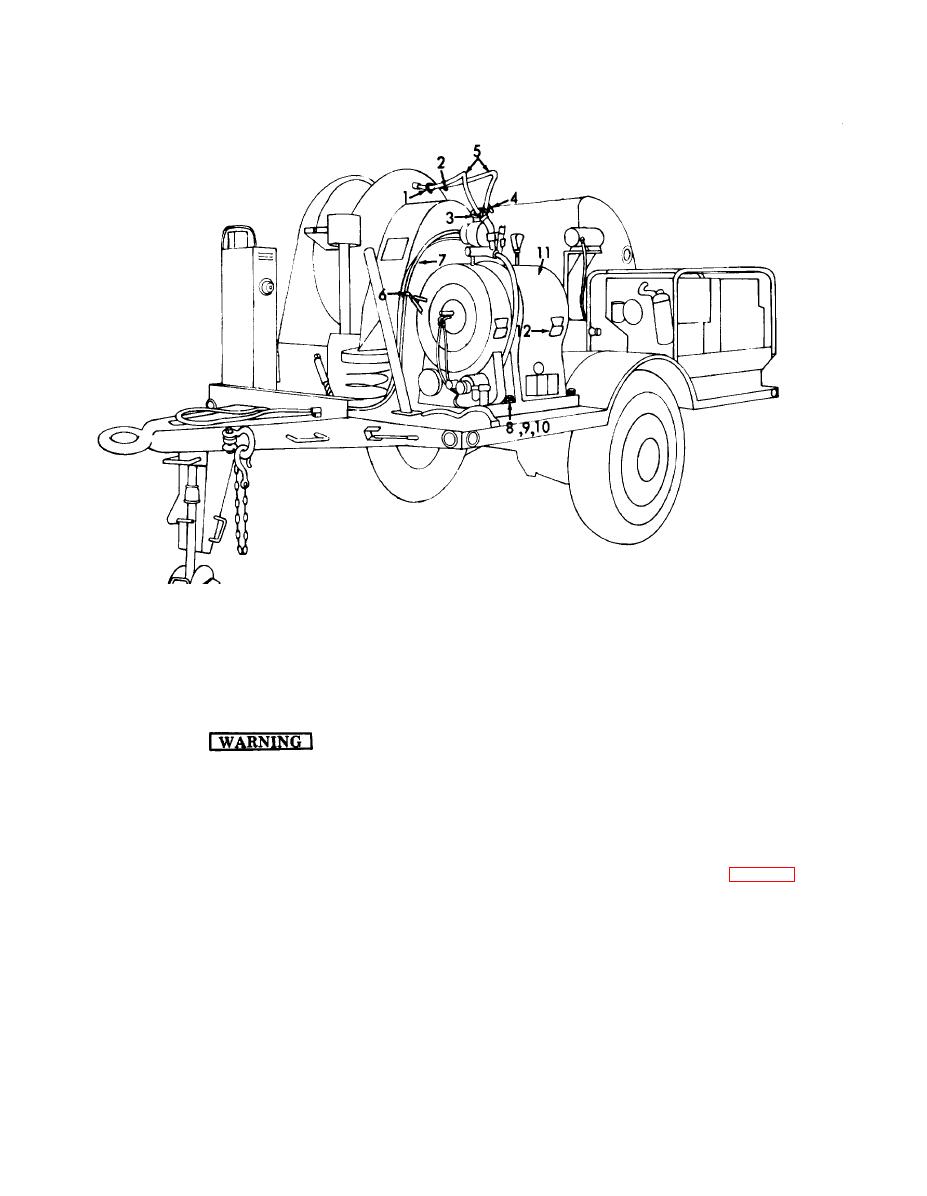
7. Airline
10. Screw
4. Clamp
1. Clamp
8. Nut
5. Waterline
11. Water heater ay.
2. Clamp
9. Washer
12. Handle
6. Clamp
3. Clamp
Figure 4-71. Water Heater Assembly, removal and installation.
4-71) in place on trailer and secure to trailer bed
b. Cleaning.
with screws (10), lockwashers (9), and nuts (8).
(2) Install air lines (7) and secure to mounting
Clean all parts in a well-ventilated area.
bracket with clamp (6).
Avoid inhalation of solvent fumes and
(3) Install water lines (5) and secure with hose
prolonged expsoure of skin to cleaning
clamps (4, 3, 2 and 1).
solvent. Wash exposed skin thoroughly. Dry
cleaning solvent (Fed. Spec. P-D-680) used
4-55. Water Heater Panel Board
to clean parts is potentially dangerous to
a. Removal.
personnel and property. Do not use near
fig. 4-72) and
(1) Remove the six screws (1,
open flame or excessive heat. Flash point of
pull the switch box cover assembly (items 8 thru
solvent is 100 to 138F. (38 to 59C.).
18) away from the switch box (22).
Clean metal surface of water heater assembly
(2) Tag and disconnect all electrical wiring,
using a clean cloth dampened with cleaning solvent
disconnect all conduits and valve line.
Fed. Spec. P-D-680. Dry thoroughly.
(3) Remove the nut (2), bolt (3) and lock-
c. Inspection. Inspect water heater assembly for
washer (4) securing the fuel line bracket to the
evidence of leaking, cracked or broken welds or
water heater panel board and bracket.
other damage.
(4) Remove nuts (5), lockwashers (6) and bolts
d. Installation.
(7) securing the water heater panel board mounting
(1) Position water heater assembly (11, fig.
bracket.
4-98
