TM 10-8400-203-23
26-14 Change 10
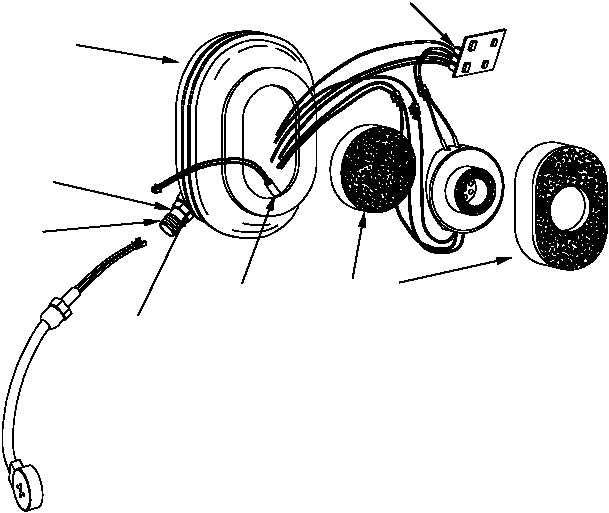
Earcup
Connectors
Silicone
applied
here
Threads
When repairing any headset component (as seen below for the left and right earcups), care should be taken to
identify cables during disassembly to facilitate proper reassembly. All cables are colored coordinated (I.E. Red
to Red, Blue/White to Blue/White, Green to Green, etc). All cable and switch entries should be resealed after
assembly with any standard commercially available silicone sealant to preserve waterproofing and the sound
attenuation, which protects hearing and aid in intelligible communications.
To repair the Mic/Boom Assy, remove the foam inserts from the right earcup. Take note of the order of
assembly. Unplug the connectors with the red & white wires inside the earcup and unscrew the Assy from the
outside using a wrench or pliers. Remove any sealant from the threads of the earcup and carefully hands
tighten the Assy into the earcup. Using the same removal tool, grasp the hex nut closest to the threads and
tighten the Assy into the earcup taking care not to strip the plastic threads. Seal around the Assy from inside
the cup with silicone sealant to preserve waterproof characteristics and the noise cancellation characteristics,
plug in the connector with the red & white wires.
Figure 26-11. Headset Assembly
26-8 REPAIR - Continued
Foam Inserts
Silicon Sealant
applied within
earcup here
Hex nut