TM 10-3510-208-12
TS 10-3510-208-12/4-51 (Sheet 3 of 3)
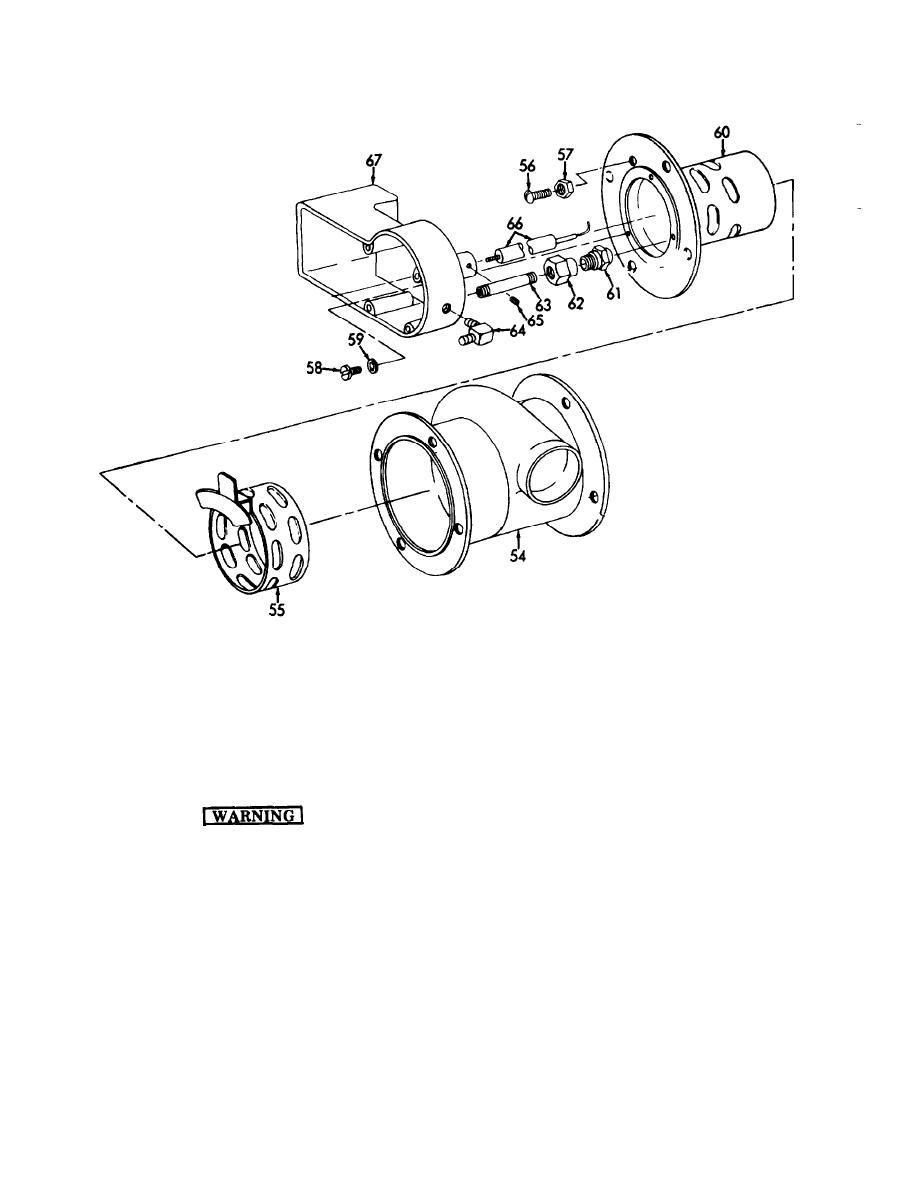
63. Nipple
59. Lockwasher
54. Chamber
64. Elbow
60. Nozzle
55. Shutter
65. Setscrew
61. Nozzle
56. Screw
66. Electrodes
62. Adapter
57. Nut
67. Base
58. Screw
Figure 4-51. Tumbler burner assembly, disassembly and reassembly (sheet 3 of 3).
(1) Clean the exterior surface and glass of the
c. Cleaning.
pressure gage in a mild soap and water solution.
(2) Clean all electrical parts with dry com-
Clean all parts in a well-ventilated area.
pressed air and a clean cloth.
Avoid inhalation of solvent fumes and
(3) Clean hoses and cables using a clean cloth.
prolonged exposure of skin to cleaning
(4) Clean remaining parts using solvent, Fed.
solvent. Wash exposed skin thoroughly.
Spec. P-D-680, and dry thoroughly.
Dry cleaning solvent (Fed. Spec. P-D-680)
d. Inspection.
used to clean parts is potentially dangerous
(1) Inspect all parts of the burner assembly
to personnel and property. Do not use near
for cracks, dents, chips, nicks, deep scores, and
open flame or excessive heat. Flash point
other damage.
of solvent is 100 to 138F. (38 to 59C.).
(2) Inspect all hardware for thread damage.
Do not use compressed air for cleaning
e. Repair. Unless damage is extremely minor
purposes except where reduced to less than
and can be repaired, replacement is recommended
30 psi and then only with effective chip
for all damaged items of the burner assembly.
guarding and personal protective equip-
f. Assembly.
ment.
4-66


