
TM 10-7360-226-13&P
0026 00
CONTAINERIZED KITCHEN (WITH TRAILER)
UNIT MAINTENANCE PROCEDURES
applicable circuit breaker in the OFF position and ON position. Follow the circuit diagrams in
switch assembly in the OFF position and ON position. Check voltage at the applicable lamp
assembly. Follow the circuit diagrams in WP 0054 00 to check connections. Replace faulty
component using the procedure in the following section.
Lighting Fixture: If the fluorescent lamps don't light upon replacement, remove the access
plate on the fixture. Refer to the ballast wiring diagram in on the ballast to check output voltage.
Replace the ballast if required using the procedure in the next section.
With the Interior Light switch ON and the Emergency Light switch OFF, depress the Test switch
on the fluorescent light fixture above the personnel entrance door. The lamps on the fixture
should be off. Turn the Emergency Light switch ON and depress the Test switch. The lamps
should be on. If the battery charger in the light fixture fails to charge with the Emergency Light
switch ON it requires replacement using the procedure in the following section.
REPLACE
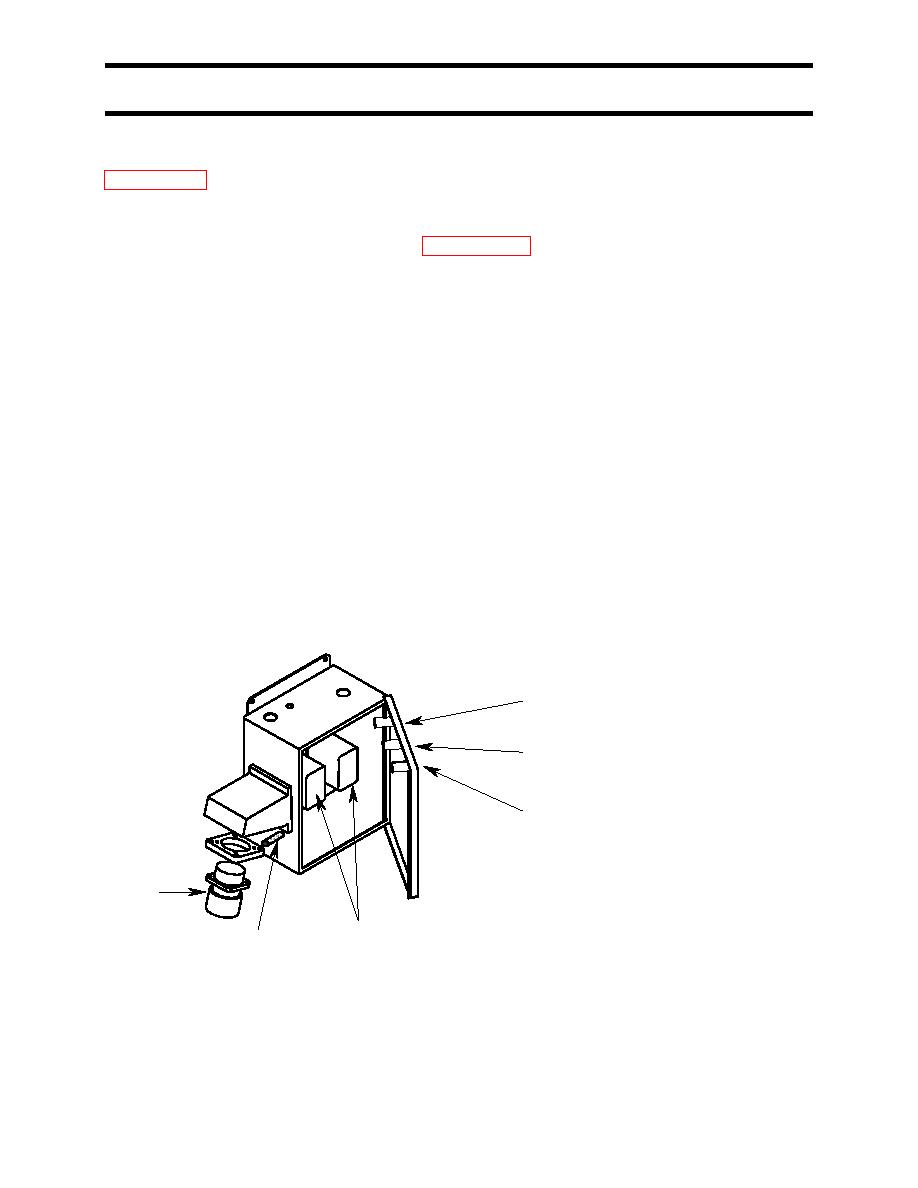
Power Entrance Panel
Power Connector: Make sure all power is turned off at the Main Control Panel. Referring to
Figure 1, disconnect the source power plug at the Power Entrance Panel and attach plug cover.
Label and disconnect power leads from the external power contactor. Remove and retain
connector mounting hardware and remove the connector. Install the replacement connector
and retained hardware. Reconnect power leads at the contactor.
E-STOP CIRCUIT BREAKER
EXTERNAL POWER
CIRCUIT BREAKER
GENERATOR POWER
CIRCUIT BREAKER
POWER
CONNECTOR
CONTACTORS
GROUND
TERMINAL
Figure 1. Power Entrance Panel.
Ground Terminal: Make sure all power is turned off at the Main Control Panel. Referring to
Figure 1, disconnect the source power plug at the Power Entrance Panel and attach plug cover.
Remove the mounting hardware from inside the Power Entrance Panel. Disconnect the green
Change 1
0026 00-2
