TM 10-3510-208-12
(g) Open the burner fuel cutoff valve one
full turn. If the fuel does not ignite within 10
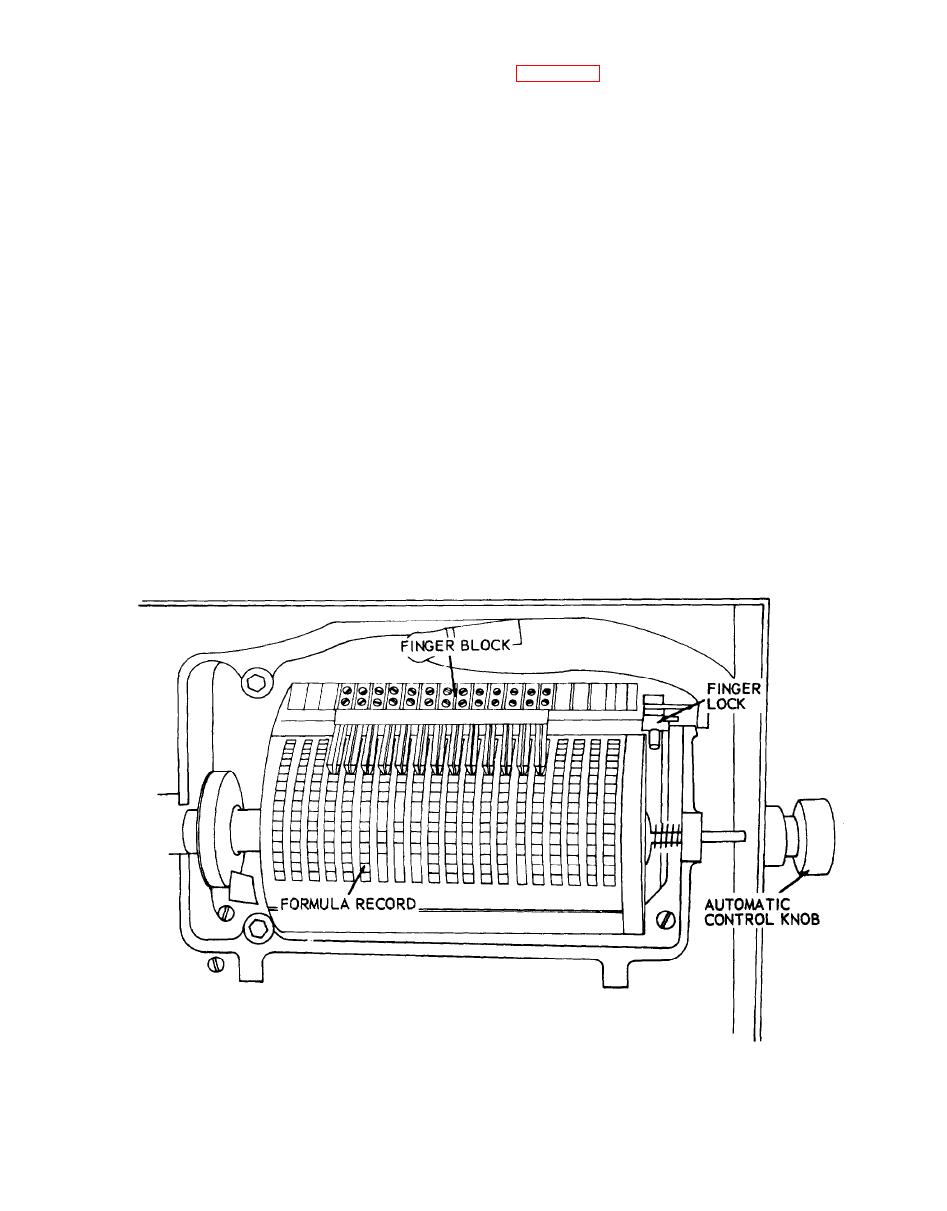
trol record.
seconds, close the valve and wait 10 to 15 seconds
1. Turn off power source and remove
before again opening the valve for fuel ignition.
The flame should become steady within 10 seconds
control box cover by releasing the clamps securing
the control box cover to control box.
after fuel ignites. Adjust the air shutters so that
the exhaust from the heater has a steady, muffled
2. Raise finger lock, open lock handle,
roar, as distinguished from a pulsating roar. The
and raise finger block out of the way.
flame should be slightly orange. Adjust the sutters
3. Pull out on automatic control knob
as necessary.
and remove formula drum from drum heads.
(h) Open the door to the tumbler dryer to
4. Remove the record lock from the tube
see if the flame goes out, then close the door and
in drum and remove formula record.
lock it to see if the flame returns. If not, refer to
troubleshooting chart.
5. Mount the desired formula record
over drum screen with bent ends of record in slot
(i) Open the door all the way and push in
of drum. Install record lock, being sure it separates
the lower manual starter assembly STOP RESET
ends of record.
button.
6. Pull out on automatic control knob
(j) When clothes are ready for drying place
and mount drum on shoulder of drive end (left
in dryer, shut the door and push in the lower
hand) drum head, rotating drum slowly by hand,
START button.
until drive clips seat in drum head.
(6) Washer-Extractor. The washer-extractor
7. Release knob so that free end drum
is now ready for manual operation. If the unit is to
head enters drum. Turn knob counterclockwise un-
be operated by the automatic controls, be sure the
til notch in drum head seats over clip.
proper formula control record is installed on the
drum. Perform the following steps to install the
8. Lower finger block and lock in place.
formula control record.
Make sure fingers contact and are at proper col-
umns on record. Close control box cover.
(a) Refer to the following instructions and
Figure 2-12. Formula control record, removal and installation
Change 4
2-19


